That’s right – only ONE week left to join the Stampin’ Up! family for just $99 instead of $175 including this FREE, EXCLUSIVE, SHELLI GARDNER SIGNATURE KIT that is a $40 value… and there’s NO other way to get it! I cannot even buy it (BooHoo).
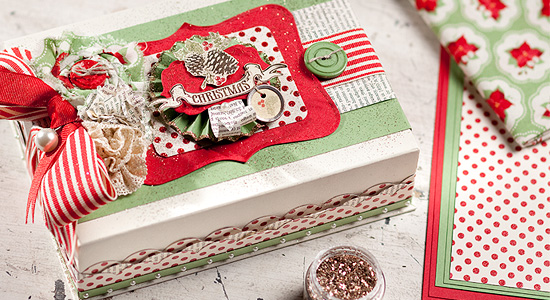
Here’s a look at this AMAZING Kit that comes for FREE!
The Christmas Keepsake Box Project Kit–a $40 value–contains the following products (quantities are 1 unless otherwise noted):
- Pines & Poinsettias Set (wood-mount)
- Keepsake box
- Scallop borders (cut from Tasteful Trim Bigz XL Die)
- First Edition Designer Series Paper (3)
- Holly Berry Designer Series Paper (6)
- First Edition Specialty Designer Series Paper strip (2)
- Holly Berry Designer Series Paper piece*
- Real Red Top Note (cut from Top Note Bigz Die)
- Real Red Decorative Label (cut from Matchbook Bigz XL Die)
- Wild Wasabi Card Stock strips (3)
- Naturals Ivory Card Stock piece
- Holly Berry Bouquet Designer Fabric*
- Real Red 1-1/4″ Striped Grosgrain Ribbon
- Real Red 5/8″ Grosgrain Ribbon
- Victoria 5/8″ Crochet Trim
- Linen Thread
- Champagne Fine Galaxy Stampin’ Glitter
- Vanilla Pearl 1/2″ Simply Adorned Bauble
- Pearl Basic Jewels (1 pkg.)
- Holly Berry Bouquet Designer Buttons*
- Large Wild Wasabi
- Small Real Red
- Mini Vintage Tags
Isn’t it just adorable!?!?!? Just spend $99 to buy THIS kit (BUT – it’s CUSTOMIZABLE so YOU actually pick what goes in it – these are just suggestions!!! You can pick ANYTHING you want for equal or lesser value!):
COMPLETE KIT CONTENTS (Customizable):
|
Page |
Item |
Description |
|
57 |
123225 |
Easy Events Clear-Mount Set* |
|
69 |
122740 |
Pennant Parade Wood-Mount Set* |
|
177 |
102277 |
Old Olive Classic Stampin’ Pad |
|
177 |
105216 |
Pumpkin Pie Classic Stampin’ Pad |
|
177 |
103133 |
Real Red Classic Stampin’ Pad |
|
177 |
119706 |
Brights 8-1/2″ x 11″ Assorted Card Stock |
|
180 |
101179 |
Basic Black Classic Stampin’ Pad |
|
182 |
107311 |
Whisper White Note Cards (20) |
|
185 |
124339 |
Just Add Cake Designer Series Paper* |
|
195 |
124142 |
Chocolate Chip 1/2″ Scallop Dots Ribbon* |
|
203 |
122129 |
Blender Pen (1) |
|
205 |
118486 |
Clear-Mount Block C |
|
206 |
104332 |
SNAIL Adhesive |
*New to the 2011-2012 Idea Book & Catalog!
When you purchase kit, there are NO STRINGS ATTACHED. However, if you decide to embark on the wonderful opportunity that you can choose to take along with it, Stampin’ Up! needs ALL KINDS of Demonstrators! What kind would you consider being?
- FRIENDS & FAMILY DEMONSTRATOR: You just want to buy all your stamping and scrapbooking supplies at a great discount and help your “friends & family” get their supplies too! Also want access to great “demonstrator only” websites and monthly idea magazine–always tons of ideas at your fingertips! No pressure to sell to others, attend events, or communicate with anyone – you just simply order when you want to.
- GIVE IT A TRY DEMONSTRATOR: You join Stampin’ Up! to see what it is all about – with no long-term commitment or plan. You purchase the kit (which is a great deal all by itself,) have a couple of workshops or classes, just to see if you might like it. If you find it’s not for you–you can become a “discount purchaser” or just say “good bye!”
- HOBBY DEMONSTRATOR: You like the idea if doing workshops and earning extra money, but only when it’s convenient for you. You might work a lot some months and very little, or not at all, during other months. You love to stamp and/or scrapbook and like to support your own “hobby” so that you can buy everything that you want with the money you earn!
- PART TIME DEMONSTRATOR: You see the potential to do a little work and earn a little money on a consistent basis. You want no pressure to ever do more than you want, but you want help and support from a “upline” who truly cares about you and your goals. You may have specific goals in mind–pay for preschool, college tuition, car payment, new furniture, etc…
- CAREER DEMONSTRATOR: You recognize the potential of being a Stampin’ Up! demonstrator and want to build a business with long-term career goals. You want to pursue management and want to move up the career ladder. You love attending Stampin’ Up! events and building relationships with other demonstrators and customers. You intend to work at your business in a consistent and outgoing manner.



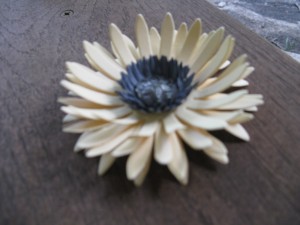
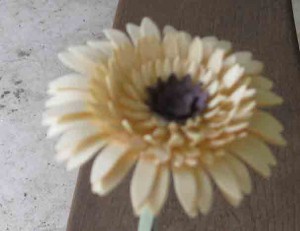
 ). Since you can cut several layers of card stock at one time with the Big Shot, these flowers are relatively quick to make. The most time consuming part is the assembly, but even that is not very much. And with such beautiful results, it is time well spent! You have plenty of time to order your big shot and this die to make some flowers before school starts – just click on the Click Here to Order button to the right and have everything delivered straight to your door! Be sure to include some pretty card stock on your order, if you don’t already have some – our new In Colors would make some gorgeous flowers!
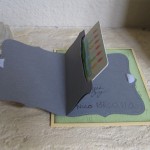
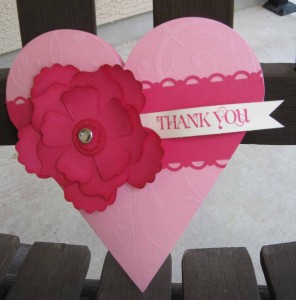
 to make it my own. I do that a LOT. It’s kind of like cooking a recipe – I don’t know how to create a dish from the beginning, but I use recipes from other people. The end result is definitely my own home made meal made with my own two hands! So I do the same with papercrafting. I find something I like and re-create it. The end result is my own home made creation, usually with a bit of tweaking. But I digress . . . . for this card I used the following SU supplies: